Columns column
The columns column is where you can configure the columns of your table
The data column is broken into two sections:
- Visible columns
- The columns listed under visible columns are the default columns that will be visible for your table.
- Hidden column
- The columns listed under hidden columns are hidden by default, but be available in the column chooser for a user to bring into the table if they wish.
Columns can be moved between visible and hidden by dragging and dropping.
You can reorder your visible columns by dragging and dropping.
Adding a Column
Columns can be added in two way
- Via the add button at the top of the columns column
- Via the Create Column Button next the an enabled field or advanced field in the Data column
Add Column
Use the Add button at the top of the columns column to add one of the three following types of columns.
When creating a column via the add column button, it will try to automatically update the data section of your table configuration with any missing fields.
- Basic
- A basic column is for anything directly stored on the target type or the the target type links to.
- Advanced
- An Advanced column is for calculated or aggregated values. An example of this would be the sum of linked invoices or a count of posts.
- Action
- An action column allows adding of supported actions for the target type from the action library.
Basic Column
A basic column is for anything directly stored on the target type or that the target type links to.
The create basic column screen is broken up into 3 steps
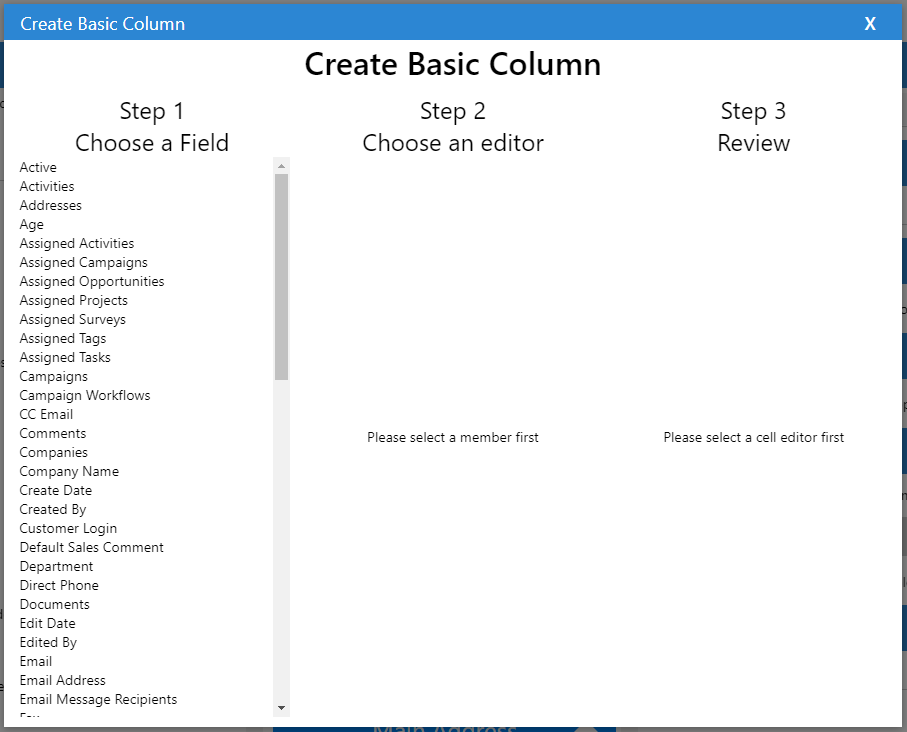
- Choose a Field
- Select the field you would like to create a column for
- Choose an editor
- After selecting a field step 2 will populate with all the cell editors supported by the selected field.
- Review
- After selecting a editor, the review column will display the options for the selected cell editor. Once you are happy with your selection click the Create Column button.

Advanced Column
An Advanced column is for calculated or aggregated values. An example of this would be the sum of linked invoices or a count of posts.
When you first open the create advanced column screen you will be presented with a library of pre-configured options. You can either select one of these options or select custom to create your own.
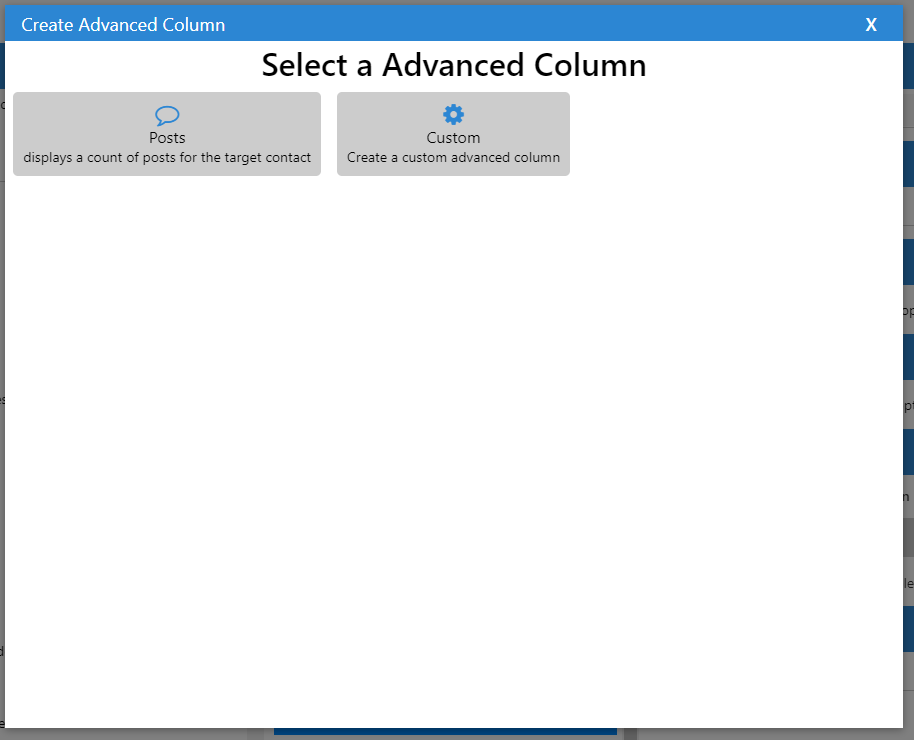
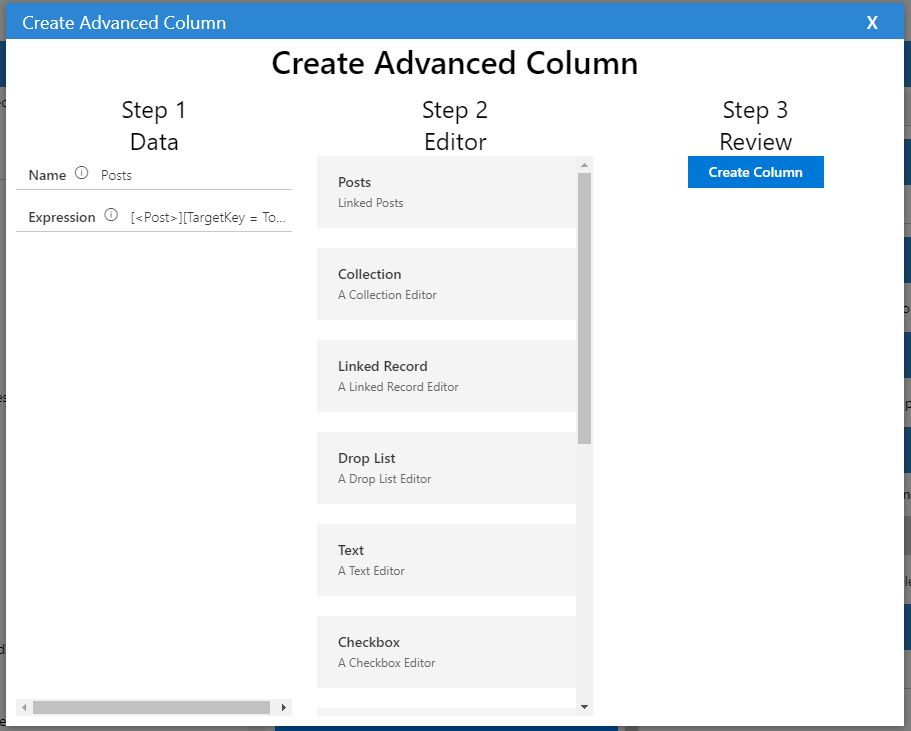
After choosing either a pre-configured item or custom you will be taken to the create advanced column screen. This screen is broken up into 3 steps
- Data
- Here you will give your column a unique name and enter the expression used to calculate the value. What is configured here will be created as an advanced field. See Data Column/Advanced Fields for more information on advanced fields.
- Choose an editor
- After populating how to load the data for your column you will need to select a editor. See Cell Editors for more information on each available editor
- Review
- After selecting a editor, the review column will display the options for the selected cell editor. Once you are happy with your selection click the Create Column button.
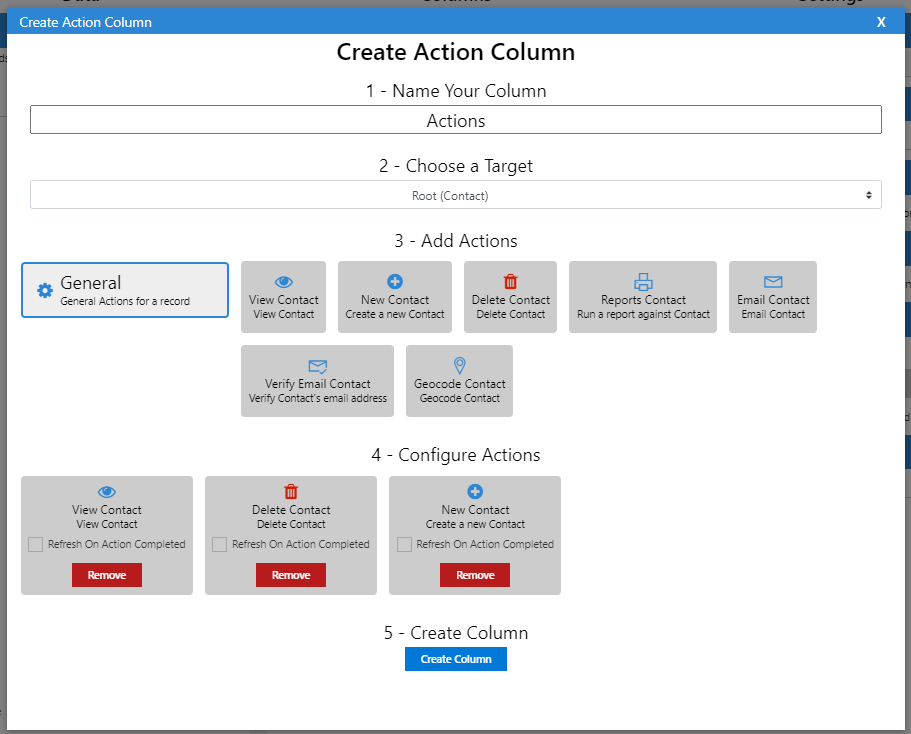
Action Column
An action column allows adding of supported actions for the target type from the action library.
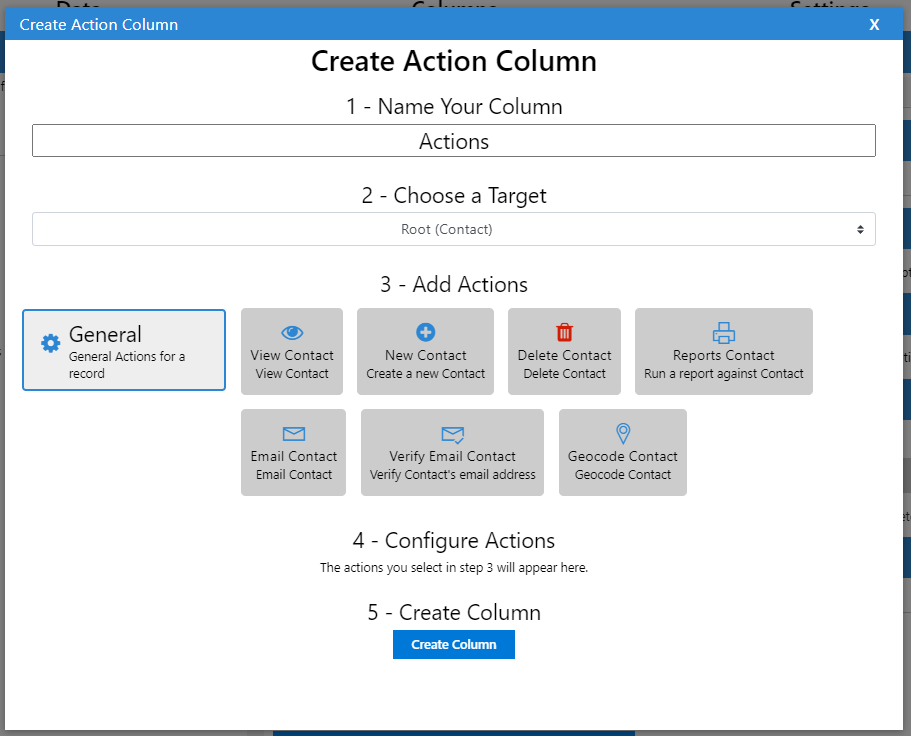
The create action column screen is broken up into 5 steps
- Name your column
- Give your action column a name.
- Choose a Target
- Action columns can target either the root record type(the type of record your table is displaying) or a type from a linked filed.
- Add Actions.
- Click on the actions you would like to display in your column. Each action you click will appear in step 4
- Configure Actions
- Configure if your action should refresh the grid or not after execution.
- Drag and drop to reorder actions.
- Click Remove to remove the action.
- Create Column
- Once you have your chosen actions setup, click Create Column.